
Rice is one of my favorite sensory bin fillers because it’s simple, inexpensive, and kids genuinely love it.
There’s just something about scooping, pouring, dumping, burying little toys, and running your hands through rice that keeps kids busy for a surprisingly long time.
And dyed rainbow rice? Even better.
Rainbow rice is colorful, fun, and so easy to make. I dye white rice in a gallon Ziploc bag with food coloring and a little vinegar. Then I just mush it all around in the bag and spread it out on large baking sheets to dry.
If you’re looking to learn how to dye rice for a sensory bin, you’re in the right place!
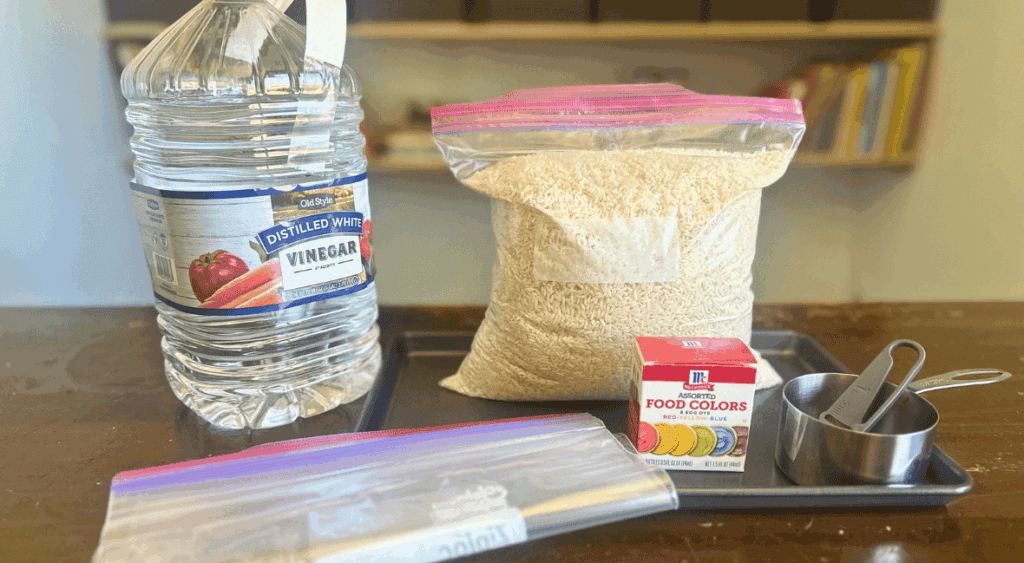
Supplies for Dyed Rice
You will need:
- White rice
- Gallon Ziploc bags
- Food coloring
- White vinegar
- Large baking sheets
That’s it. Nothing fancy.
How to Dye Rice for a Sensory Bin
Ingredients
- 2 cups white rice
- 1 teaspoon white vinegar
- Food coloring
You can make as much or as little as you want. If I am making rainbow rice, I usually make one bag for each color.
Step 1: Add Rice to the Bag

Pour your white rice into a gallon Ziploc bag.
I like using a gallon-size bag because it gives the rice enough room to move around when you mix it.
Step 2: Add Vinegar
Add about 1 teaspoon of white vinegar to the bag.
The vinegar helps the color spread around and stick to the rice. The smell goes away once it dries.
Step 3: Add Food Coloring

Add several squirts of food coloring.
The more color you add, the brighter and bolder the rice. Measure with your heart. You can always start small and add more if you want.
Step 4: Seal the Bag
Seal the bag tightly.
If kids are helping, I always double-check the seal before they start mushing it around. You can also double-bag it if you are worried about leaks.
Step 5: Mush It Around
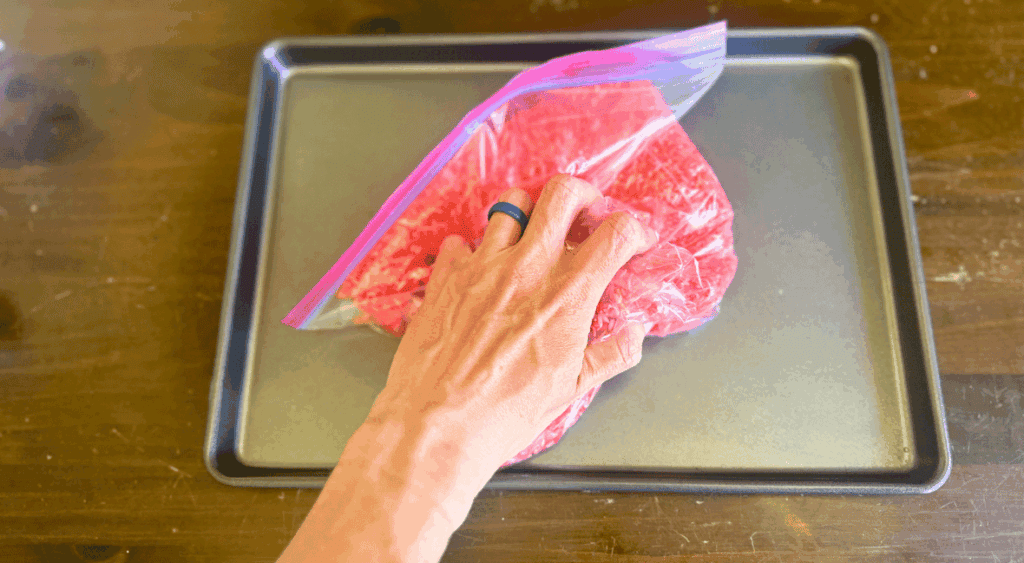
Now mush, squish, and shake the bag until all the rice is coated.
Kids love helping with this part. It’s fun to watch the rice change color, and it gives them a way to help make the sensory bin before they even start playing with it.
Add more food coloring if needed.
Step 6: Spread It Out to Dry
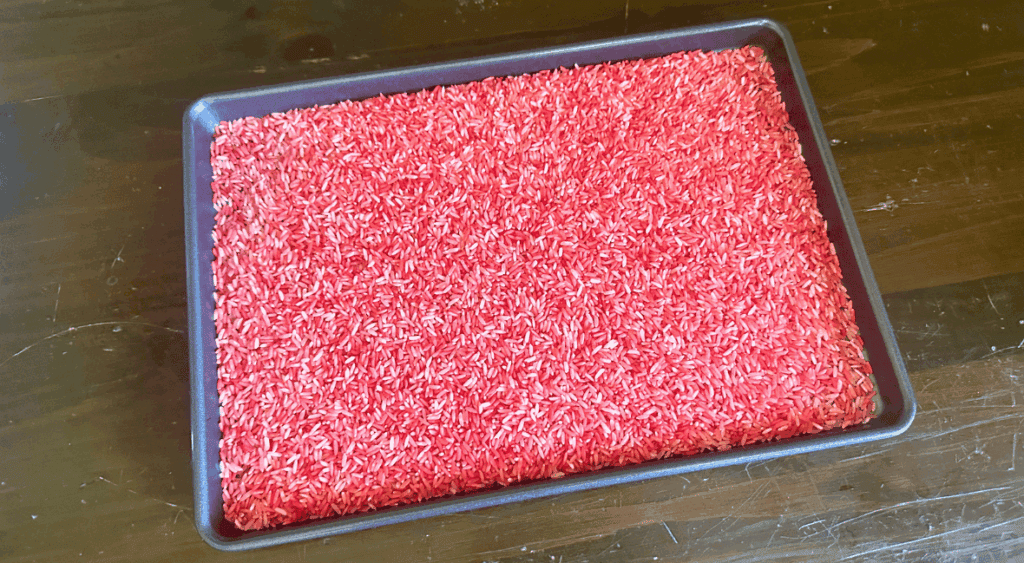
Pour the dyed rice onto large baking sheets and spread it into a thin layer.
The more spread out it is, the faster it dries. If you’re making different colors, you can use separate baking sheets or keep the colors in different sections.
It usually dries in a few hours, but I like to leave it a little longer just to make sure. You can stir it around once or twice while it dries to break up any clumps.
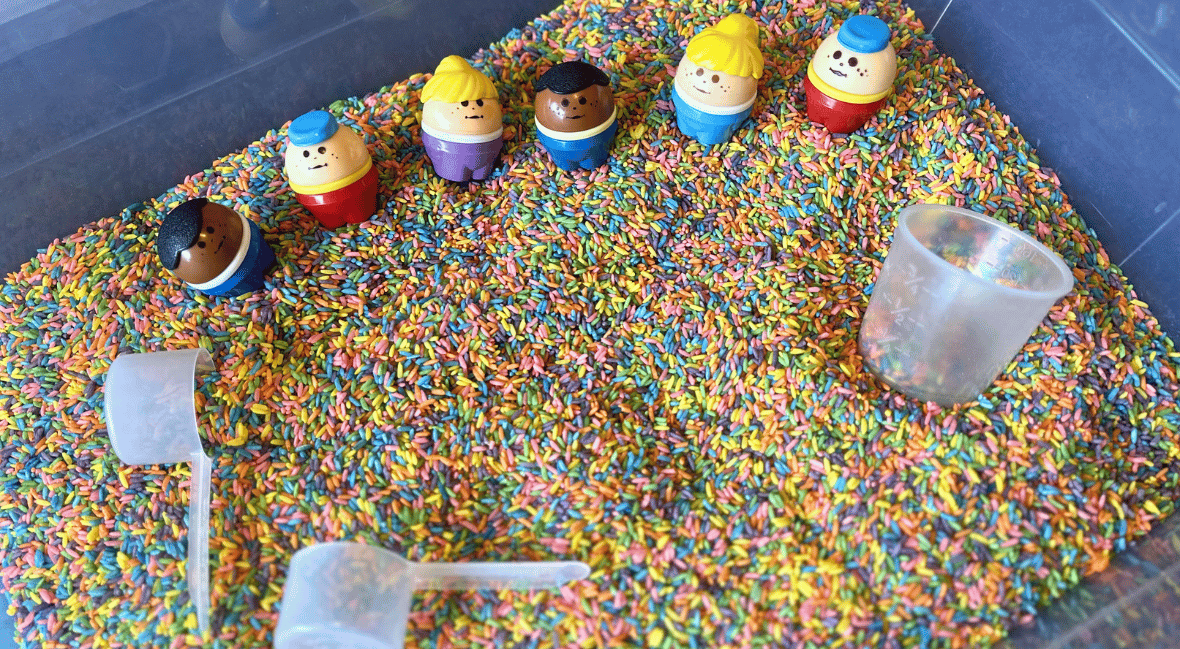
Step 7: Add It to a Sensory Bin
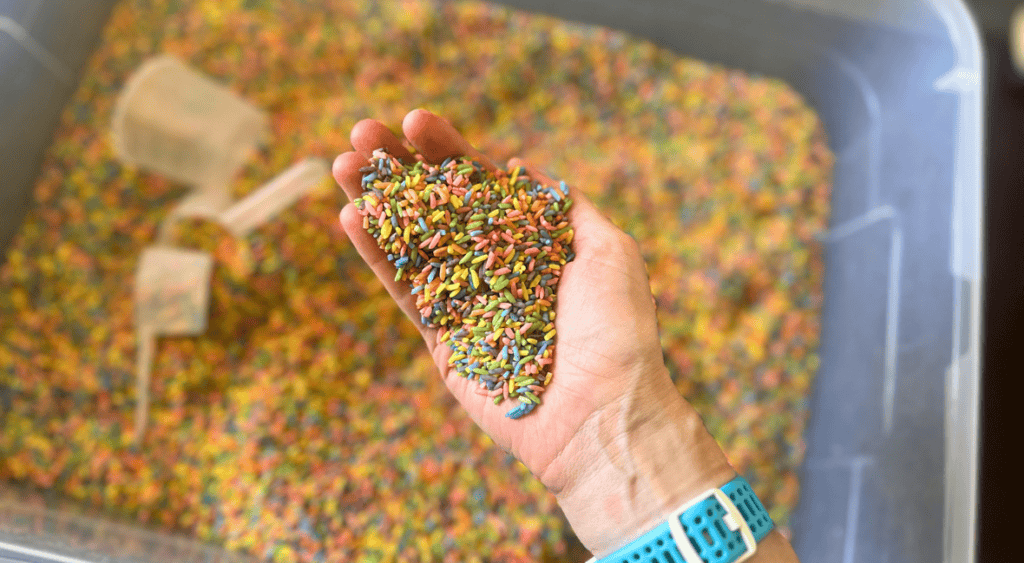
Once the rice is dry, pour it into a bin, tray, or large container.
Add scoops, bowls, measuring cups, spoons, funnels, trucks, animals, or whatever your child might enjoy.
And that’s it. You have dyed rice ready for sensory play.
Tips for Using Dyed Rice
- Use a large bin if you want to contain the mess a little better.
- Let the rice dry completely before storing it.
- Store dyed rice in a sealed bag or airtight container.
- Throw it away if it gets wet or dirty.
- Supervise young children, especially if they are still likely to put rice in their mouths.
How Long Does Dyed Rice Last?
Dyed rice can last a long time if it stays dry. I usually store it in a sealed bag or container and pull it out again for future sensory bins.
That’s another reason I like it. You can make one batch and use it over and over.

No Comments